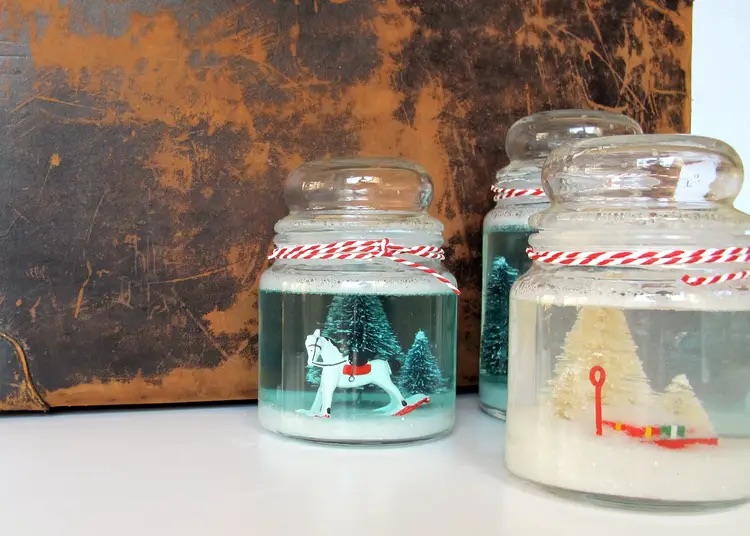
Making your own snow globe can be a fun and creative DIY project. Here’s a step-by-step guide to help you create your very own snow globe:
Materials you’ll need:
1. A clean, empty glass jar with a secure lid (mason jars work well)
2. A small figurine or ornament that you want to place inside the snow globe
3. Waterproof glue or epoxy
4. Distilled water
5. Glycerin (available at most craft stores) – this helps the snowflakes fall slowly
6. Glitter or fake snowflakes
7. Optional: acrylic paint or spray paint for the lid (if you want to customize it)
Step-by-step guide to make your own snow globe DIY:
1. Clean the jar: Make sure your glass jar is clean and free from any dirt or residue. This will ensure a clear view inside the snow globe.
2. Choose your figurine: Select a small figurine or ornament that will fit inside the jar and represent the scene you want to create in your snow globe. It could be a tiny house, a miniature tree, an animal, or anything you like. Ensure that it is waterproof or coat it with waterproof glue or epoxy to protect it from the water.
3. Attach the figurine: Using the waterproof glue or epoxy, securely attach the figurine to the inside of the jar lid. Make sure it’s centered and stable. Allow the glue to dry completely according to the manufacturer’s instructions.
4. Add snowflakes: Sprinkle some glitter or fake snowflakes inside the jar. You can experiment with different colors or sizes to achieve the desired effect. The snowflakes will float and create a snow-like appearance when you shake the snow globe.
5. Fill the jar: Fill the jar with distilled water almost to the top. Leave a small space to prevent overflow when you insert the figurine and close the lid.
6. Add glycerin: Add a few drops of glycerin into the water. The glycerin will thicken the water and help the snowflakes fall slowly, giving a more realistic snowfall effect.
7. Test the snowfall: Before sealing the jar, test the snowfall effect by gently shaking it. Adjust the amount of glitter or glycerin to achieve the desired snowfall rate.
8. Seal the snow globe: Carefully place the figurine inside the jar with the lid facing down. Secure the lid tightly to prevent any water leakage. You can use additional waterproof glue or sealant on the threads of the lid to ensure a watertight seal.
9. Optional: Customize the lid (optional): If you want to add a personal touch, you can paint the lid with acrylic paint or spray paint. You can also decorate it with stickers or other embellishments.
10. Let it dry: Allow your snow globe to dry completely before turning it upside down and giving it a shake to enjoy the snowy scene inside.
Remember to handle the snow globe with care, as it contains water and glass. Now you have your very own DIY snow globe to shake and admire whenever you want to experience a winter wonderland!
Also read:
11 Easy and Cute DIY Fall Decoration Ideas